Welcome back to another fun doll clothes project, dollings!
It's great to have you here because that means you are safe, healthy, excited, and in the mood for some creative mini-venture.
In today's project will be tackling that super-secret pocket.
It's there, but you only see it when the doll tries to get something from there ;D
This tutorial shows you how to incorporate these neatly-pressed pockets on shorts, culottes, trousers, even skirts (maybe in the future, just pants for now...)!
 |
| Wide-leg Trousers with Invisible Pockets worn by Fashion Royalty |
This written copy of the tutorial is a perfect companion for those who want to hand-sew while watching their favorite TV shows on the couch.
Just right-click on any blank area of this page, click Print, and follow your printer's instructions.
For those who like to watch the process videos I prepared via my Youtube channel, you can click the links below:
PLAYLIST - How to Sew: Invisible Pockets on Doll Shorts and Trousers
Part 1: Preparing the Fabric
Part 2: Sewing the Pockets
Part 3. Finishing the Shorts/Trousers
Alright, I think we are ready to start!
Below are the tools and materials I used in the project:
woven fabric
printed sewing pattern
plastic tape
scissors
pencil or any fabric marker
diluted white glue (DIY anti-fray solution)
sewing needle/ sewing machine
thread
dressmaker's pins
tweezers
thimble
measuring tape
snaps
Are you ready, dollings?
Let's get started!
1. Print your sewing pattern and put tape on the pattern pieces to avoid tearing during use.
2. Carefully cut all your needed pattern pieces. In this case, we need three namely the Front, Back, and Pocket pieces.
3. Bring in your fabric.
4. Start with cutting your waistband fabric piece. Use the measurement suggested on the pattern page.
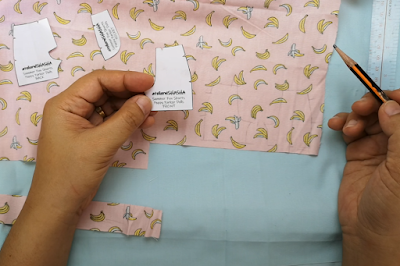
5. Trace your pattern pieces to the fabric.
6. You can also label each fabric pattern piece for easy distinction during the process.
7. All in all, you will need one pair of Back panels, a pair of Front panels, and two pairs of pockets, in mirrored copies. Including the waistband we previously cut, we have 9 fabric pieces to use.
8. Apply your DIY anti-fray solution AKA diluted white glue to the edges of your seam allowance.
9. Let dry, before cutting.
10. Cut your fabric pieces, adding the seam allowance thickness that you are comfy with. I like to use 5mm to 6mm or 1/4-inch for most of my doll clothes sewing.
11. Grab a pocket piece that matches a panel piece. Make them face each other's right sides and stitch.
12. Do the same for the remaining three pairs of panels and pocket pieces.
13. Grab a front panel assembly and align it to a back panel. Pin to secure.
14. Stitch from the top down to where the pocket opening starts.
15. Then start stitching again from the lower pocket opening point, down to the bottom hem.
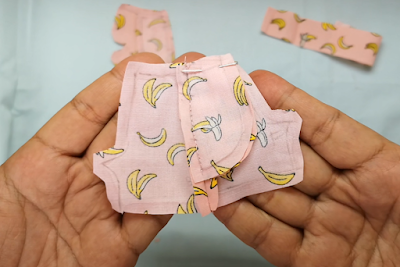
16. Pin-baste your pockets together to the front panel side.
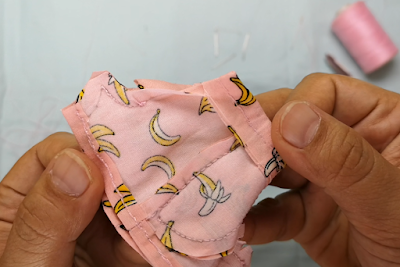
17. Stitch to close the pocket bag.
Here's our invisible pocket, yay!
18. Do the other side.
19. Next, join the two front panel sides and pin the rise.
20. Stitch along the rise seam.
21. Cut slits along the curvy line of the rise.
22. Press flat the front rise seam allowance.
23. Run a backstitch on the front of the rise that is shaped like "J", which in human-sized clothing is used to reinforce the zipper.
24. Hem your bottoms.
25. Cut slits along the curvy edges of the waistline seam allowance.
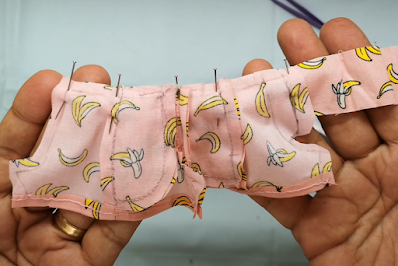
26. Pin the waistband to the waistline.
27. Stitch to secure waistband to the waistline.
28. Pull gently your waistband away from the seam and flatten.
29. Now, facing the inner side of your garment, grab your waistband and fold horizontally away from the seams.
30. Pin baste to secure.
31. Secure and stitch the side edges of the waistband.
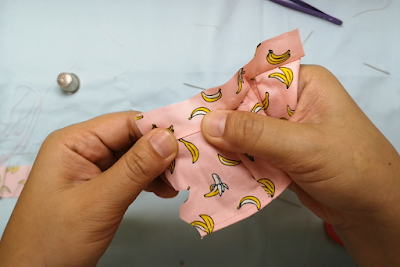
32. Take your tweezer and tuck in the side edges of the waistband.
33. Sew the folded waistband to secure.
34. Close the back rise halfway through.
35. Cut slits on the curvy inseam allance.
36. Stitch the inseams.
37. Flatten inseam allowance and secure to the sides.
Yay, our garment with invisible pockets is now almost done!
38. Let's just add a set of snaps on the waistband edges, and we're ready to go!
And here it is!
 |
| The Front |
 |
| The Back |
 |
| And the Invisible Pocket! |
I hope you enjoyed this project, dollings!
I have done so many doll shorts and pants using this technique, and I hope you give it a try and see what you think of it.
Thanks so much for getting to the bottom of this post.
Please comment if you have questions, or I might have missed something that you want to help clarify.
Take good care and I'll see you at the next tutorial!
xoxo,
shasha











Comments
Post a Comment
Let's chat!