Heyyy!!! How is 2022 coming for you, guys?
I hope you are safe, healthy, and doing great, despite the seemingly universal FLU-right-after-NYE!
For some reason, almost everyone I know had flu right after celebrating the New Year. Some are a little late for the party, like experiencing the symptoms only recently. Mostly, however, even with my friends outside of the Philippines, were down with flu during the first few weeks of the year. Whew, what a way to set the year, right?
So, anyway, life had been busy, as usual, so let me share with you this tutorial on how I created this commissioned piece from last year. I was reminded to share this because this outfit seems to be a great futuristic outfit that protects you from colds, or something! Haha!
Kidding aside, I hope you find this tutorial useful.
Enjoy, loves, and see you at the next one!
Futuristic Jumpsuit for a 1:6 Female Action Figure
Sewing Tutorial
Tools
Any woven fabric, or this shiny polyester fabric of sorts
hand-sewing needle or sewing machine
thread ( I use the nylon - invisible, yes - one here)
miniature/doll zipper
fabric scissors
patterns
pencil or any fabric marker
Notes
For this polyester fabric, I used a 1mm transparent sewing thread.
The garment was machine-sewn with the smallest available (1mm) stitch width.
A miniature/doll-sized zipper was used.
Patterns used are designed for the medium-bust female action figure.
Procedure
Step 1. Trace the patterns on your fabric.
Step 2. Add seam allowance and cut.
Step 3. Hem back top panel1 (CL, CR) and back top panel2 (BL, BR).
Step 4. Pin-baste shoulder seams of the front top panel (A) to back top panel2 (BR) and back top panel1 (CR).

Step 5. Sew the pin-basted pieces in Step 4.
Step 6. Repeat shoulder seams on the other side.
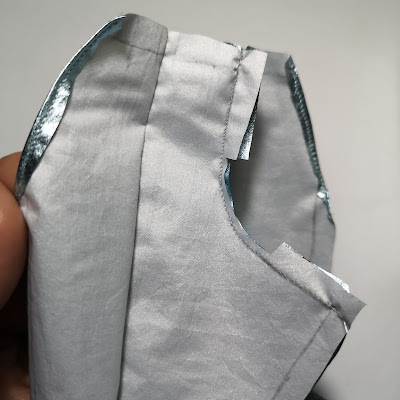
Step 7. Trim off the shoulder seam allowance and cut slits along both armscye allowance.
Step 8. Sew sleeves (DR, DL) on both armscyes.
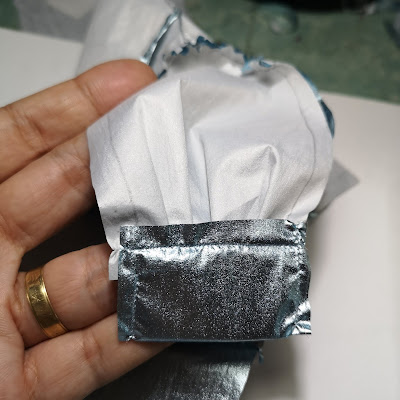
Step 9. Attach cuffs (EL, ER) to the edge of sleeves incorporating folds to align sleeve seams.
Step 10. Repeat step 9 on the other sleeve.
Step 11. Use an interlining to insert into the cuffs for added strength.
Step 12. Close to secure.
Step 13. Do the same on the other sleeve.
Step 14. Sew the sleeve seams.
Step 15. Repeat step 14 on the other sleeve.
Step 16. Hem the side pockets of both front pant panels (GL, GR).
Step 17. Stitch on the centerfold of GL and GR.
Step 18. Sew front crotch seam.
Step 19. Trim off parts of seam allowance to avoid bulk.
Step 20. Prepare to join together front pant panels (GL+GR), pocket bag left (HL) and back pant panel (IR).
Step 21. Join the three pieces together along the pant outseams.
Step 22. Repeat step 21 on the other side.
Step 23. Join together your assembled top and bottom pieces, making sure the folds on the front pant panels are incorporated so both side seams align.
Step 24. Topstitch the waist seam for added durability.
Step 25. Stitch-baste the zipper at the center back (CL, CR).
Step 26. Sew to secure both zipper sides.
Step 27. Attach mock neck lining (F), fold inside, and topstitch on the inner side to reinforce.
Step 28. Sew back crotch seam and trim off some seam allowance.
Step 29. Hem pants (sorry, I lost the/missed taking a photo).
Step 30. Sew inseams (sorry, I lost the/missed taking a photo).
There you go!
Let me know in the comments what you think of this piece, okies?
Have a great weekend, dollings!


Hi Shasha! It also happens to me that I get carried away working and I forget to take photos. That's one of the hardest thing about craft or sewing posts, remember to actually take photos!
ReplyDeleteI like that this is different from some of your other designs, which often look more lightweight compared to this one. It's great that you're venturing into different things, and baggy clothes have been trending for quite some time. I could see this on a music video or a concert. The top part could be adapted to make a really cool jacket. Not that I know how to do that!
I don't know if you've watched a TV show on Netflix called "Next in Fashion". One of the contestants, Angel Chen, often wears baggy and oversized clothes, and this reminds me of that. It filmed a few years ago, but what I like about it is that it had contestants from all over the world, so you can see a diversity of styles and influences.
Wish you a lovely and productive week ahead!
Right? Perhaps we just need to invest in a better craft-recording setup and more memory cards, hahaha!
DeleteHappy to know you like to see this somewhat un-shasha design here, dear. I was surprised myself, but indeed it's good to try new things, isn't it? So true, these pieces are great for music videos or a concert diorama. Perhaps, I can incorporate this when I do my Blackpink dolls someday. Haha! I'm sure when you start learning how to sew, time will come when you can also adapt your patterns to the designs you want.
I haven't watched that TV show but I will check it out this week, as it sounds interesting ;)
You, too, dear have a lovely amazing week ahead and as always, thank you so so much for dropping by! xoxo..
Waw, i am very impressed by you Futuristic Jumpsuit. It is very well done. 😮
ReplyDeleteThank you so so much, dear 😍😍😍
Delete