Sew your own Doll Bikini Set
Hey, dollings!
Welcome back to another doll clothes project!

It's been months since the last tutorial post I think, but I hope you have enough crafting projects to tide you up while I was doing all my other dolly shenanigans :)
So today, we are making this simple bikini set for our curvy doll. This design was a collaboration with our doll friend MC from Spain. MC runs the blog themonstercrafts.blogspot.com where she shares her doll and diorama adventures as well as tips on diorama making, photography, and more. Please check out her blog, Youtube channel, and Instagram, too.
MC was one of the winners when I had a coaching lessons contest last year during my blog's 10th anniversary. Thanks, MC for joining the contest, and congrats for winning, too! For her prize, she wanted to sew a bikini set and a cover-up for her curvy doll. She wanted something simple and easy to sew just like this design we agreed upon.
If you're keen on sewing along with me, you'll only need very basic sewing tools and materials.

Our model today is my curvy Made to Move doll, Aki.
Here are our materials and tools:
knit fabric
matching thread
thread for basting
pair of metal snaps (or any closure you like to use)
pair of fabric scissors
thread scissors
measuring tape
ruler
tweezer
seam ripper
sewing needle/s
dressmaker's pins
fabric pen marker or pencil
Your doll
Sewing pattern (you can make your own, or get this set from my shop soon)
Alright! Let's get started!
1. After printing, be sure to have your printout at the correct scale by measuring the box on the page with a straight ruler.

2. Cut out your pattern pieces.

3. Trace the patterns on the wrong side of your stretch/knit fabric.


4. Cut the fabric pieces along your added seam allowance edges.

5. Let's start sewing by connecting the two triangle cups. Pin-baste before sewing if you need to.


7. Stitch-baste the neckline for easier hemming later.

8. Hem the neckline.

9. Clean up the extra seam allowance.

10. Stitch-baste the other side, which is the side areas of this triangle top.

11. Hem and cut away extra seam allowance on the other side, too.

12. Secure the inner corners of your triangle top to the bra band's middle point with your dressmaker's pins.
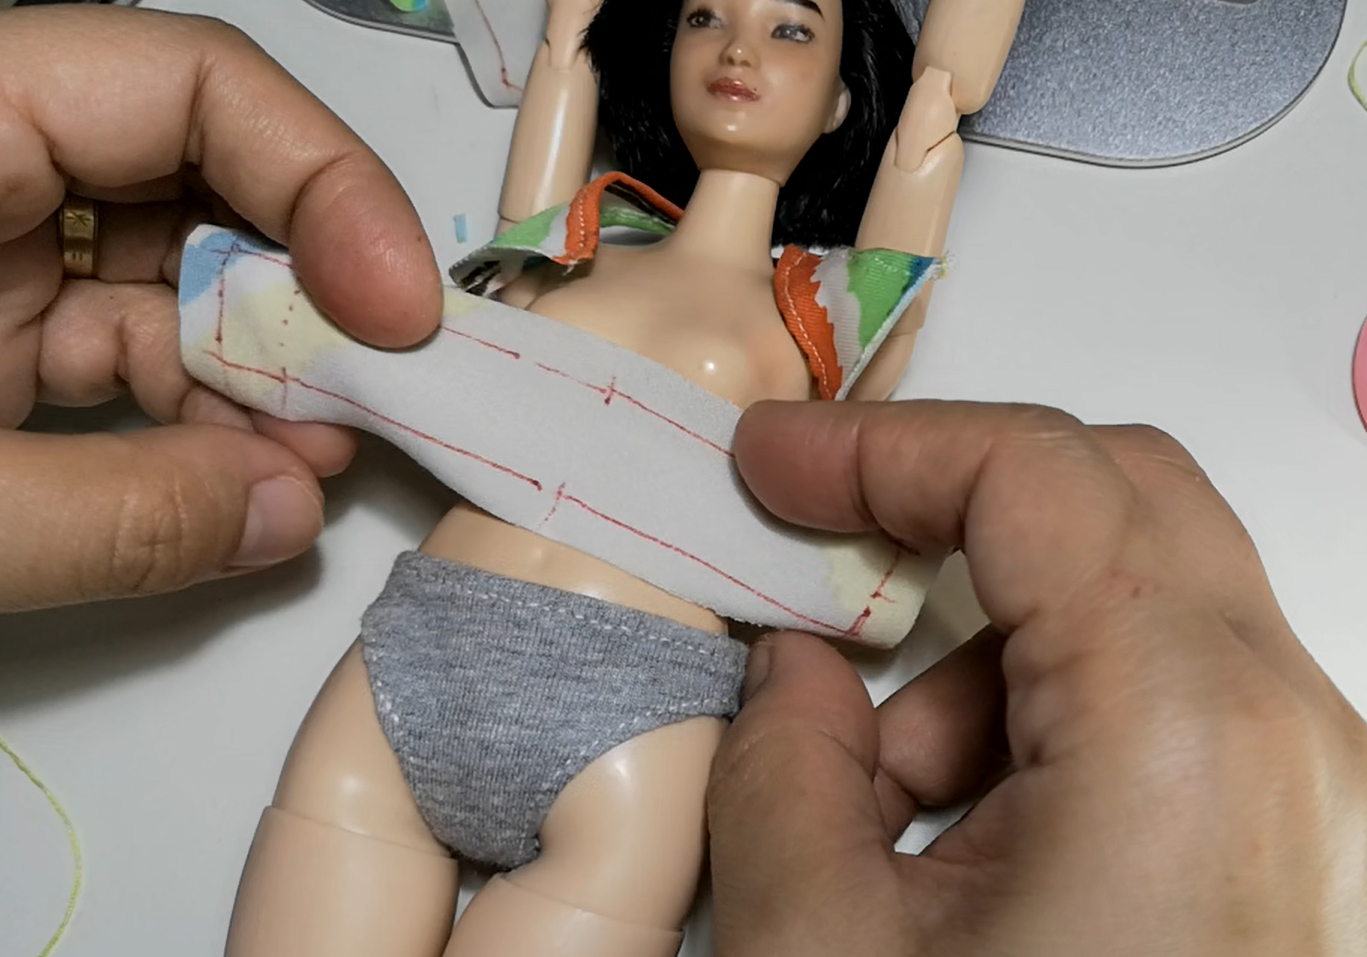


13. Stitch-baste if you like to avoid the sharp points while sewing later.

14. Sew together the bottom of triangle top and bra band, and remove any stitch bastings after.

15. Close the bra band and start with pinning the fold to prepare for sewing.

16. Start sewing only the outside seams. Leave the part that is connected to the triangle top not sewn.


17. Trim off the corners and seam allowance for a less bulky bra band.

18. Carefully flip to the right side using a tweezer.

19. Insert the tringle top seam allowance into the folded bra band and pin-baste to secure.

20. Stitch-baste this fold for easier stitching later.

21. Top-stitch to seal the upper fold of the band.

22. You can add your snaps during this stage.

23. Now let's grab the two fabric bikini bottom pieces, front and back, and pin-baste the side seams and inseams to prepare for sewing.

24. Sew the side seams as well as the inseam.

25. Cut slits along the seam allowance edges.

26. Stitch-baste your waistline hem for easier final stitching later.

27. Hem your waistline, remove the bastings and trim off the extra seam allowance.

28. Stitch-baste your pant hems for easier final stitching later.

29. Hem the panties, remove the bastings and trim off the extra seam allowance.

30. Try the fit on your doll and when you're happy with it, you're basically done!

Thank you so much for finishing through this project, dollings!

I hope you had fun making this set!
If you are on Instagram or TikTok and your doll might be wearing a bikini set that you made from this tutorial, please use the tag me on or use the hashtag #ateliernishashaDIYs okies?
I would love to see your creations, too!
Again, thank you for always supporting my craft, and see you at our next dolly session!
xoxo,
shasha
Hi Shasha! When you sent me the post, I skipped the intro and went directly into the instructions, so I haven't managed to read the full post until now. Thank you so much for the shoutout and for taking the time to link all of my socials.
ReplyDeleteI love how the bikini set looks in this colorful fabric. You could make another one and it would look different, depending on which part of the fabric you choose to cut from. I also like the slight overlap of the triangles. You can give the top a slightly different look by separating them a bit or overlapping them.
Hope you're having a nice weekend. Talk to you soon!
Hi MC - I hope the tutorial helped a lot. I know we don't get to discuss sewing much in our sessions because we chat more about other things hahaha so this documentation hopefully should make up for that :D
DeleteTrue, the possibilities are endless. The slight overlap was unintended but I'm glad it gave you an idea for another version :D
Thank you so much as always for dropping by and yes, the weekend went well. I hope you enjoy the rest of yours, too!