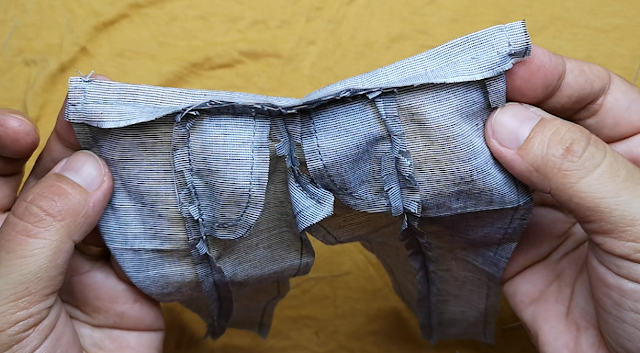
How-to: Trousers and Trouser Shorts with Top Slanted Functional Pockets
 |
| Skinny Trousers for Made to Move Barbie dolls |
Hey, dollings!
Welcome to this how-to page, wherein I share with you how I sew my doll trousers and trouser shorts
with top slanted functional pockets.
with top slanted functional pockets.
 |
| The Relaxed-fit version for the Curvy Made to Move Barbie |
 |
| High-waist Cropped Trousers for FR and NuFace dolls |
 |
| It's a Poppy Parker/ Darla Daley body there in this striped pair of trousers |
 |
| This Dress Pants for the Articulated Finnick Ken doll, too... |
 |
| How about this pair of Cigarette Trousers for the Pivotal Barbie? |
I love this simple but elegant pair. I had at least three pairs of them over my more than a decade of working in an office environment. They pair well with most of my tops, even with the prints and bright colors. I can't help but add them to my girls' wardrobe.
So here we are, making them in miniature scale, yay!
So here we are, making them in miniature scale, yay!
Oh, by the way, if you'd like, I already have the video version of this tutorial on my Youtube channel.
Here's the written version now ;)
 |
| Click this to go to the video playlist... |
Here's the written version now ;)
In this demo, I used the following supplies:
Woven fabric (not stretchy)
matching thread
metal snaps
fabric glue (watered down)
pattern pieces
pencil
pair of scissors
brush (for spreading glue on fabric)
hand sewing needles
bright-colored thread for basting
tweezer
dressmaker's pins
Alright, let's start crafting!
1. Trace pattern pieces on the wrong side of the fabric.
2. Spread watered-down fabric glue on all edges of the seams to prevent fraying.
3. Once glue has dried out, cut pattern pieces with your preferred seam allowance.
4. Attach a pocket to the left-leg front pant piece, together facing each other's right side.
5. Following the slant mark, stitch to secure.
You can see I basted the two first so they don't move while I sew. You can also use pins.
You can see I basted the two first so they don't move while I sew. You can also use pins.
6. Flip to the right side of the fabric and baste to temporarily secure.
7. Repeat steps 4 to 6 on the right-leg front piece.
 |
| You now have two front-pant assemblies. |
8. Grab one front-pant assembly, its matching back pant piece, and a matching pocket piece,
and pin to align and anchor.
and pin to align and anchor.
 |
| A pocket piece, a front-pant assembly and a matching back pant piece |
9. Pin to secure the three pieces while you sew.
10. Stitch the side seams.
11. Seal the pockets.
12. Baste the joint pocket to the waistline of the front pant to secure.
13. Cut slits into the curvy sides of the side seam allowance.
14. Press flat the side seam allowance.
15. Repeat steps 8 to 14 on the other front pant assembly.
16. Stitch the front crotch seam.
17. Cut slits into the curvy edges.
18. Press flat the front crotch seam allowance.
Note:
For those of you who are working on Ken's Dress Pants,
please make sure to stitch the darts at the back panels
before proceeding to Step no. 19. Thank you...
19. Grab the waistband piece of fabric and attach to the waist edge of the assembly.
20. Fold waistband to its wrong side and stitch the side edges.
21. Flip to the right side and pin.
22. Stitch the waistband into the hidden seam.
23. Hem the bottom edges of the pants.
24. Stitch to close halfway through the back crotch.
25. Pin to secure the inseams.
26. Stitch the inseams and cut slits into curvy parts.
27. Press flat inseam allowance and secure to the sides.
28. Flip over and place a set of metal snaps at the back.
29. Do some fitting and you're done!
Yay!
How was it? Was it a little too complicated?
The process may be quite tedious but for I'm sure you've learned something today ;)
I hope you find this post helpful in your miniature crafting adventures.
Let me know in the comments below what you think, okies?
For now, let me make another outfit and later share with you my process.
So til then, take good care and see you again!
xoxo,
shasha


zzz
ReplyDeleteLearn to sew trousers and shorts with top-slanted functional pockets in this step-by-step guide. Perfect for style and utility, just like the Best Beekeeping trousers, these designs offer comfort, durability, and practicality for any occasion.
ReplyDeleteI love the Trousers For Women from Fithub Fashion. They are so comfortable and fit me perfectly. I have also bought the Trousers For Women for my daughter. We both love our Fithub Fashion trousers! The quality is great and they look very stylish.
ReplyDelete